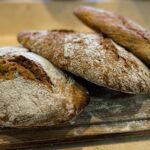
Rosemary Scented Whole Grain Sourdough Bread
A healthy whole grain spelt sourdough bread with a hint of rosemary. A great starter bread for the novice sourdough bread maker.
Servings 2 loaves
Equipment
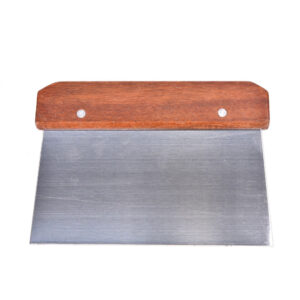
- A metal baking/pastry/pasta spatula is highly recommended. It is not essential but it does make the process much easier. Pictured below in the instructions.
Ingredients
- 500 ml water at room temperature
- About 250 g active sourdough starter If you use my starter recipe, then this is the amount you'll have in one portion
- 600 g whole spelt flour
- 50 g whole rye flour
- 2 teaspoons sea salt
- 1 ½ tablespoons dried rosemary optional
Instructions
- In a large bowl, mix the water with the sourdough starter and then mix in all the flours, stirring until there are no more lumps.
- Cover the bowl with a clean dish towel and let it rest for 30 minutes to 1 hour. This is what is known as an autolyse. You can read about this in the text above.
- After your dough has rested for 30 minutes to 1 hour, mix in the salt and the rosemary, if using. Knead the bread for as long as you have the energy to and ideally at least a few minutes. Because the dough is quite wet, this kneading is done with a spoon (I use a sturdy wooden spoon) and done by stirring, folding and pulling. Work that dough by folding it, stirring it and stretching it with the spoon.
- Once you've run out of energy, cover the bowl with the same dish towel and leave it for one hour.
- After one hour, you'll perform the first folding (check out my video above). Cover the bowl again and leave it for one more hour and then perform the second folding. If you've got time for it, you can perform one last folding after yet another hour. Cover the bowl in between. (If you've only got time for one folding then that is better than nothing).
- Once you have gone through the folding phase, leave the dough on the kitchen counter, covered, for about 4 hours or longer.
- After these 4+ hours you should place the bowl in the refrigerator or some place colder overnight. This will allow the flavors to develop slowly and give the loaf that deeply rich sourdough flavor.
- The next morning, take the bowl out of the fridge and place it back on the kitchen countertop. Leave it here for several hours before proceeding to the baking phase. I usually don't bake my breads until mid to late afternoon, but don't take my word for it. Your sourdough is different from mine and ambient temperature also plays a role, so you need to pay attention to your dough to know when it is ready to be baked. It will be at its peak once it is no longer rising but before it starts to deflate. This is the ideal time to put it in the oven. This timing is not an exact science but the change from one phase to the other also does not happen in a flash. Just pay attention to your dough and you'll be fine. A hint: As long as the dough is rising, the dough will be slightly curved downward at the edges of the bowl. Once it stops rising, the top will flatten out.
To shape and bake the breads (see video above):
- Turn on the oven to 250º C / 480º F. Place your baking tray inside the oven and leave it for at least 15 minutes. It needs to be very hot for best results.
- Next you’ll need to work fast in order to keep as much heat in the baking tray as possible. Here we go: Once your oven is thoroughly hot, take the baking tray out and cover it with a piece of baking paper, then gently pour the dough onto a generously floured worktop surface (countertop in most cases). Be sure to flour it well as the dough will be quite sticky.
- Start by folding the dough over itself once. This is easiest done using a metal spatula (see image below for the type I'm using). Then, and again using that same metal spatula, divide the dough into two equal portions. With the spatula in one hand and your other free hand, both dusted generously in flour, gently shape the bread and, as you do that, try to tuck the dough under itself. The idea is to make it tighter without loosing the air bubbles inside. This technique takes a bit of practice but you’ll get the hang of it after a few bakes.
- Gently transfer the breads to the baking paper and place the tray back in the oven.
- Bake for 10 minutes at 250º C / 480º F, then lower the heat to 240º C / 460º F and finish baking the breads, about 25 to 30 minutes total or until nicely browned and they sounds hollow when you tap on them.
- Remove from heat and let the breads cool down on a cooling rack.
- Enjoy within 24 hours and then freeze any leftovers. Or make the Best Ever Garlic Bread. Link to recipe below.
To make buns instead of breads:
- Once your oven is thoroughly hot, take the baking tray out and cover it with a piece of baking paper, then gently pour the dough onto a generously floured worktop surface. Be sure to flour it well as the dough will be quite sticky.
- Gently cut the dough into desired sizes - I use a metal spatula which has been floured well - but be gentle! You want to keep the air bubbles intact as much as possible. Place the buns on the baking paper.
- Bake the buns at 250º C / 480º F for 12 - 15 minutes or until nicely browned.