How To Make A Sourdough Starter From Scratch
A step-by-step guide to how you can make your own sourdough starter and start baking beautiful breads in a week or less.
Ingredients
Day 1
- 125 grams water at room temperature
- 100 grams whole rye flour
- 25 grams whole wheat flour
Day 2 and through to the finish
- 100 grams water at room temperature
- 75 grams sourdough starter from yesterday
- 25 grams whole rye flour
- 25 grams whole wheat flour
- 50 grams white bread flour
Maintenance #1: When baking larger breads (200 to 250 grams sourdough starter needed)
- 100 grams water at room temperature
- 75 grams sourdough starter
- 25 grams whole rye flour
- 25 grams whole wheat flour
- 50 grams white bread flour
Maintenance #2: When baking smaller breads (115 to 150 grams sourdough starter needed) and when prepping for the fridge.
- 80 grams water at room temperature
- 60 grams sourdough starter
- 20 grams whole rye flour
- 20 grams whole wheat flour
- 40 grams white bread flour
Instructions
Day 1:
- Mix the flours and water together in a glass jar and cover with a piece of cloth or paper. It needs to be able to breathe so don’t put a tight fitting lid on it. Leave it for 24 hours.
Day 2:
- Mix it all together in a glass jar and once again cover with a piece of cloth or paper. You can reuse the cloth from day 1. Leave it for 24 hours.
Day 3:
- Use the same recipe as you used on day 2. Cover with that same piece of cloth and once again leave it for 24 hours.
Day 4:
- On this day you will start to feed it twice a day, once in the morning and once in the evening. Try to space it out so it gets fed roughly every 12 hours.You will be using the same recipe as you have been using since day 2.
Day 5:
- Repeat what you did on day 4. That is feed twice, using the recipe from day 2.By now your starter should be quite active already.
Day 6:
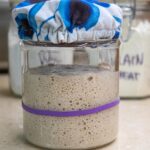
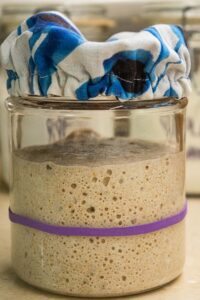
- Repeat what you did on day 4 and 5 but now you can start to keep an eye on exactly how active your starter is. This is best done by placing an elastic band around the glass jar, indicating the top level of the newly fed starter and then keeping an eye on how fast it doubles in size.Once your starter gets to a point where it doubles in size in six hours or less it will be ready to bake with. Until this happens simply keep doing what you have been doing the last few days, feeding the starter every 12 hours or so.
Day 7:
- Repeat what you did on day 4, 5 and 6, using that elastic band to keep an eye on how fast it rises.
Day 8 and onward, if needed:
- If you starter has yet to reach the point where it doubles in size in six hours or less, you simply keep feeding it as you have been doing, once every 12 hours.If you get to a point where your starter stops responding to a fresh feeding, in other words it stops rising after a fresh feeding, then something has gone wrong and you'll need to start over. This is quite rare, though, so don't let that possibility keep you from starting in the first place.
Once your starter is up and running:
- Once your starter gets to the point when it is ready to bake with you should split it in two (or more depending on how many breads you are planning to make), so you also have a starter to bake with next time. I do this by making one starter following the Maintenance #2 recipe above and one starter following either of the maintenance recipes depending on which bread(s) I'm planning on making. The first starter then goes to the fridge - properly sealed with a tightly fitted lid - once it has shown some good activity, usually after a couple of hours. It does not need to double in size but it should be allowed to rise a bit before putting it to sleep. The second starter is then used in the bread recipe after it has doubled in size in six hours or less.Another option is this: If the bread recipe you are planning to use doesn't call for the full amount of sourdough starter you have at hand (200 to 250 grams) then you can simply skim off a few spoonfuls (60 to 75 grams total), put it in a clean jar, seal it tight and place it in the fridge. I don't personally follow this method myself, as I am always fearful of forgetting to take some starter aside before mixing it into the dough. A scary scenario leaving me without a starter.
Waking up your sourdough starter after it's been refrigerated:
- Remove the starter from the fridge and give it a fresh feeding following the maintenance #2 recipe above. You can also used the Maintenance #1 recipe but you'll just end up wasting more, as the starter will need several feedings before it is back up and running. Remember, you only use part of the old starter at each new feeding while the rest is discarded.Give it another fresh feeding after 12 hours and continue this every 12 hours cycle until your starter doubles in size in six hours or less, at which point it is ready to bake with. Don't forget to split it at some point during this process so you'll also have a starter next time you want to bake (see above).If you bake fairly regularly, and the starter has only been refrigerated for about a week, then it will most likely only need three feedings to get back up to speed. If it has been refrigerated for several weeks then it will need more feedings to properly wake up. Just keep feeding it every 12 hours until it doubles in size in six hours or less.