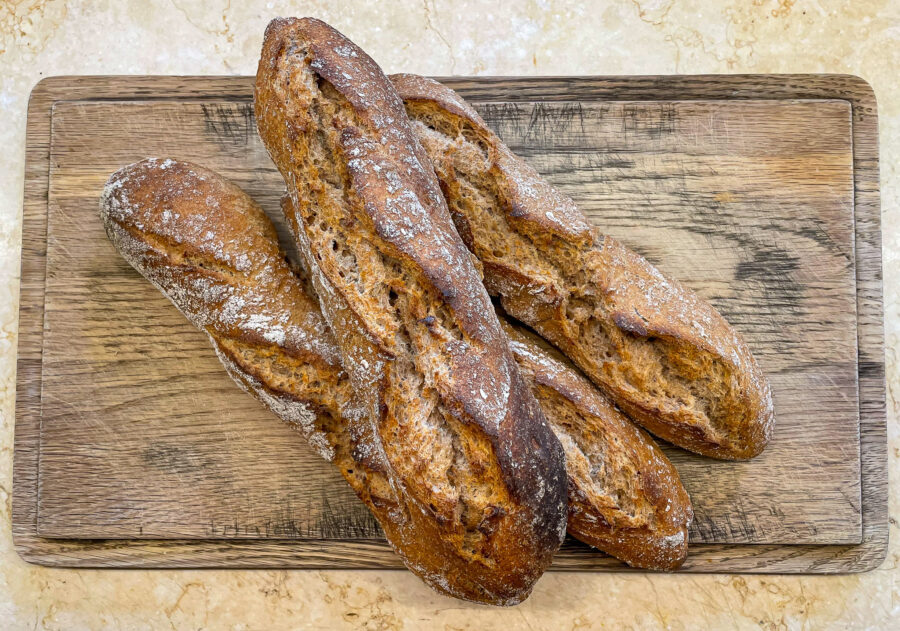
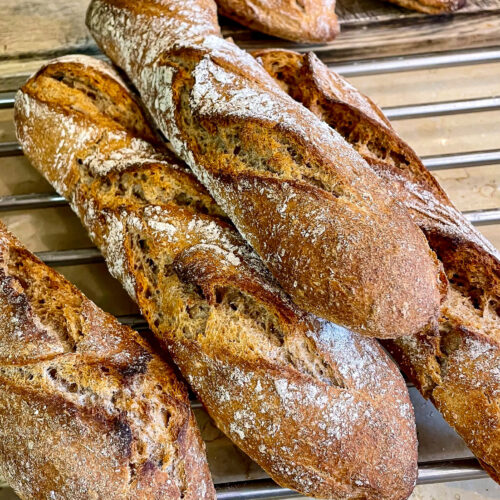
Crusty on the outside and chewy on the inside.
Those of you who have tried any of my other bread recipes will know that I only bake 100% sourdough breads. This is first and foremost because sourdoughs taste so much better than breads made with commercial yeast and, secondly, because sourdough breads are much healthier for us. And these whole grain spelt sourdough baguettes are to die for!
Sourdough breads are not difficult to make but they do require some planning and of course a sourdough starter. Baking sourdough breads can also seem a bit intimidating at first but like most other things in life, practice makes perfect.
A slight note of caution, though: If this is your first time making a sourdough bread I suggest you start out with a slightly easier recipe, like this Rosemary Flavored Whole Spelt Sourdough Bread. This is because a dough made with a sourdough starter as the only leavening agent is looser than a standard bread dough made with commercial yeast. This makes the shaping of the breads a little tricky the first time you do it. On top of that, making perfect baguettes require a special folding and shaping technique. This takes a little getting used to with this type of loose dough (I’m still a novice in this technique myself). Hence my suggestion that you practice with a slightly less loose dough for your very first sourdough bread and then come back here once the looser dough has become the new normal.
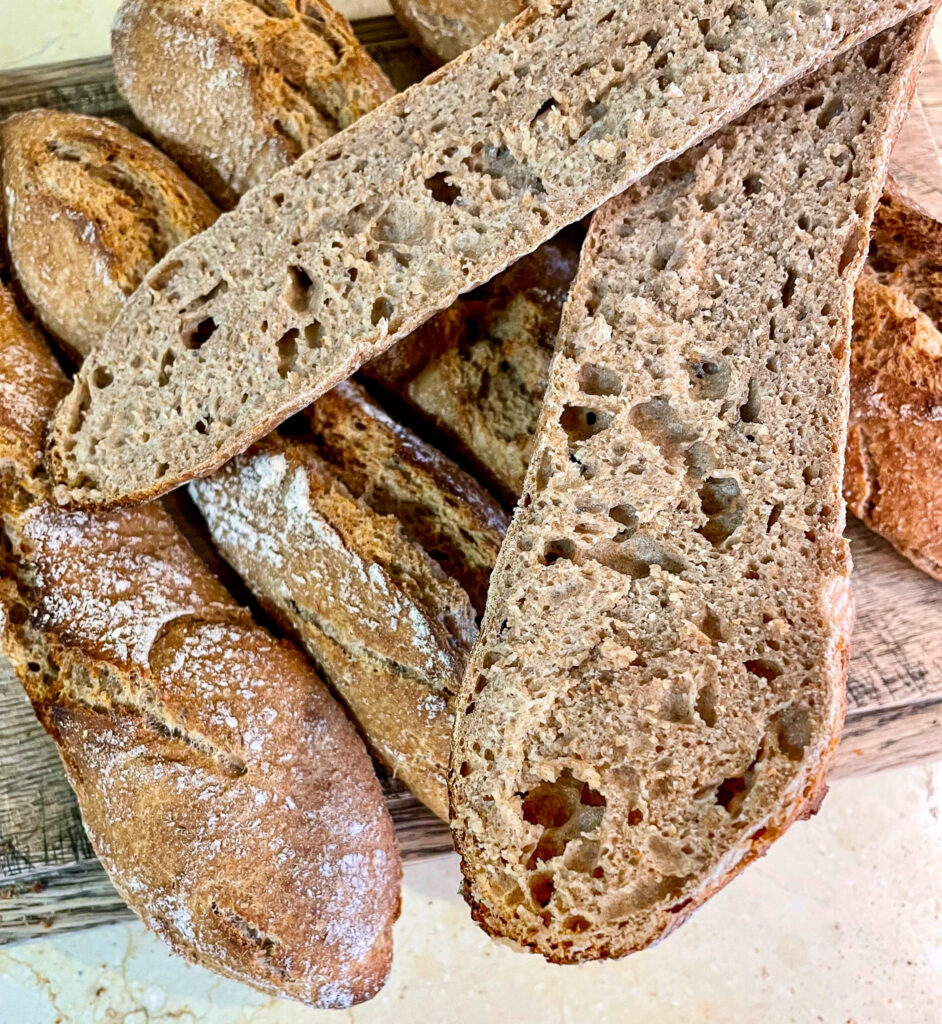
These whole grain spelt sourdough baguettes – I should actually say demi-baguettes, for they are about half the length of a standard baguette – are just like baguettes should be: Crusty on the outside and chewy on the inside.
Thanks to the whole spelt flour, which is the only flour I use here, these breads have a fantastic deep and intense flavor so much more interesting than whole wheat. However, if you cannot find whole spelt flour you can of course substitute with whole wheat.
The Sourdough Process
Sourdoughs behave differently than breads made using baker’s yeast. Because of this, there are a few techniques you’ll need to get the hang of in order to make the best loaves. But fret not! These are all techniques you will quickly pick up on, even though the whole process may initially feel somewhat daunting.
Folding:
A technique which is central to sourdough bread making is to fold the dough. This is something you do one or several times during the first few hours of the rising cycle. This stretches the dough in a gentle manner, introduces air and aids the development of the gluten.
To fold the dough, first wet your hands. Then grab one edge of your dough with both hands, digging down towards the bottom of the bowl and along the edge of the bowl so you get a good grip. Then gently pull it up and fold it towards the center, essentially you’ll be folding it over itself. Try not to tear the dough. Turn the bowl 90 degrees and repeat. Turn and repeat twice more until you’ve come full circle and performed a total of four folds. I posted a quick video below showing you how it is done.
Perform the first folding one hour after you first mixed all the dough ingredients together (after the autolyse – more on that below). If all you’ve got time for is one folding then that’s OK. Even better will be if you can do it twice or even three times, at one hour intervals.
Autolyse:
Another thing which bakers often do when making sourdough breads is what is called an autolyse. Autolyse is a technique in which you mix the water and flours with your starter and leave it to rest for anywhere from 30 minutes to a couple of hours, after which you mix in the salt and any other ingredients you may want to add. During this phase, enzymes in the flour begin to break down the starches and the proteins. This results is a dough that is easier to shape and work with and a loaf with better rise, flavor and texture. By not mixing in the salt from the beginning you essentially give the microorganisms a head start.
Texture:
As already hinted to above, another way in which sourdough bread doughs differ from regular yeast bread doughs, is that sourdoughs are usually wetter. This means they are looser. These demi-baguettes are no different. This takes some getting used to, as the dough is worked and shaped in a different way. For example, you won’t be kneading it the “normal” way using your hands. Rather, you’ll be using a sturdy spoon or spatula to stir, pull, and stretch the dough in the bowl. And when the time comes for you to shape the dough into breads and put them in the oven, you will need to work somewhat quickly, yet gently, so that the dough does not run away from you, so to speak, or deflate. The good news about this particular dough is that it holds its shape well, even though it is quite loose.
Shaping Baguettes
Baguettes are shaped using a special technique where you first fold the top of the dough down on itself. This is followed by stretching the sides out, and then folding those in on themselves as well. This sequence is repeated two to three times depending on the size of the baguette. This recipe is for demi-baguettes, the short and stubby kind, so I only repeat this folding twice. I have added a quick video in the recipe below showing this technique.
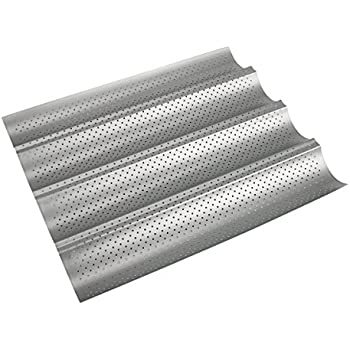
Special Equipment
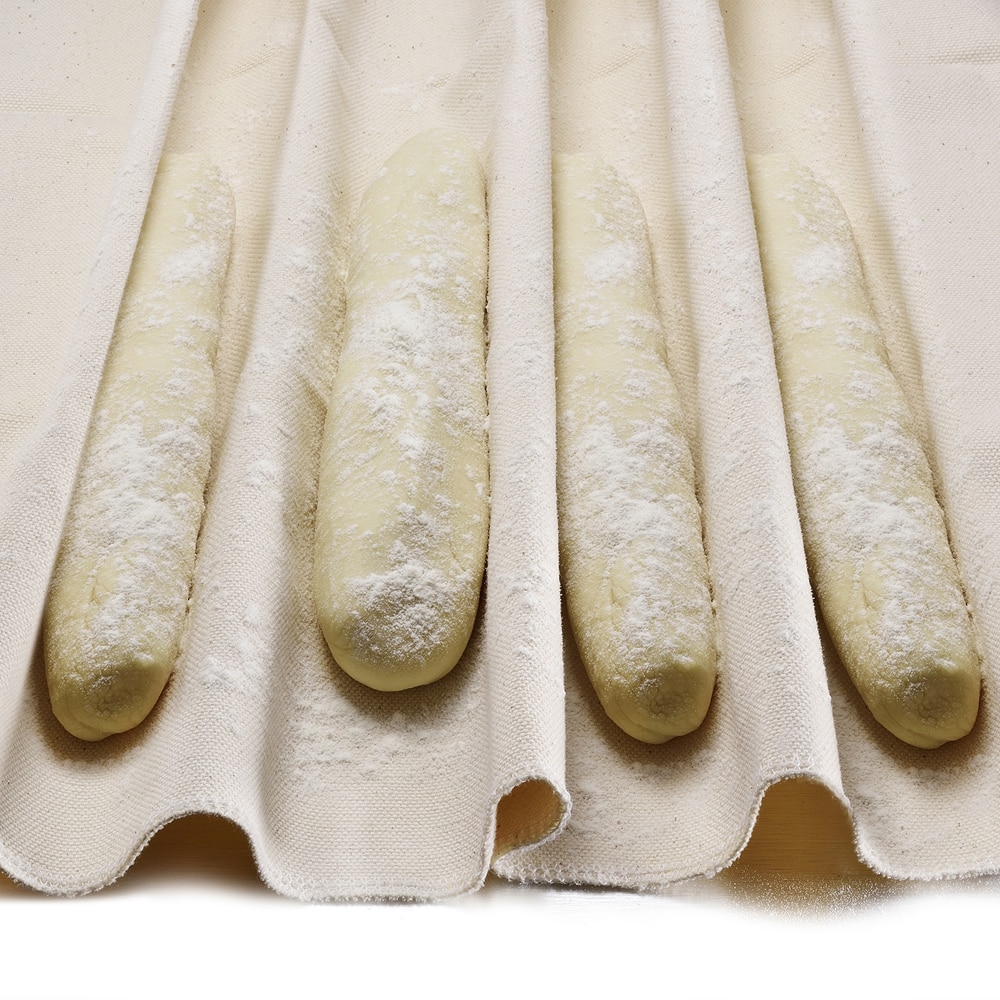
I personally use a type of baking tray made for baguettes (below on the left) and cover that with baking paper. This tray is not essential but I do find it helpful. If you do not have one of those trays, you can rest your shaped baguettes inside folds created in a well floured thick dish towel (use two if they are the thinner kind). Rest the shaped baguettes in this until you are ready to place them in the oven, which will then be on a regular baking tray covered with baking paper.
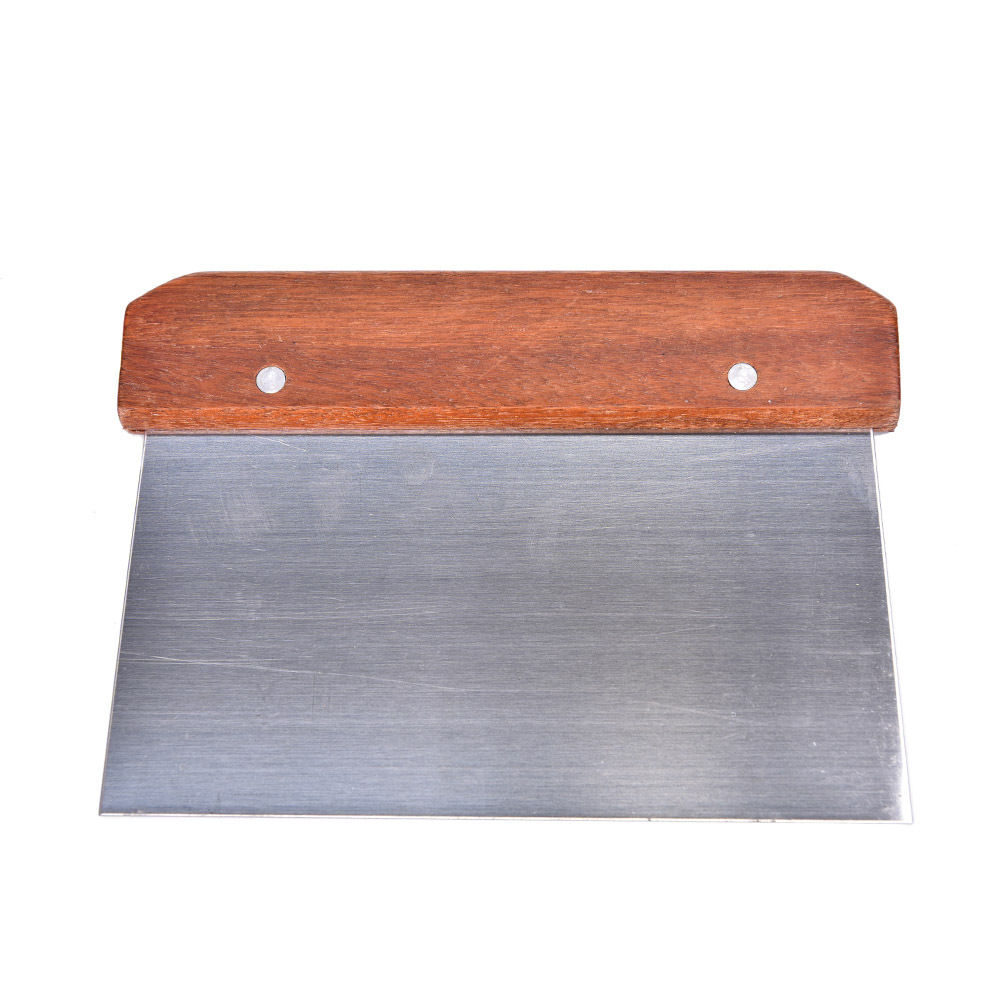
I also use a metal spatula which makes working with loose and sticky sourdoughs so much easier. These are cheap so I highly recommend having one at hand before starting out.
Steam & Heat
Steam is essential in order to create a crusty baguette and so is a very hot oven. As a home baker, using a non-commercial oven, the hottest temperature most of us can get is 250º C (480º F). This is perfectly fine.
In order to create the steam I place a glass baking dish in the bottom of the oven and pour boiling water into it at the same time as I place the breads in the oven. This works surprisingly well.
How To Store
Baguettes don’t stay fresh for long. If you don’t eat them all that same day I suggest freezing them, whole or cut to desired sizes. All you’d have to do to get that lovely crust back is to defrost them. I use a microwave in order to bring them back to that just-out-of-the-oven hotness. Then slice lengthwise and toast. They’ll be as good as new. You can also defrost them and place them in a hot oven for 10 minutes. This is what I do if I already have my oven going.
Whole Grain Spelt Sourdough Baguettes
Equipment
- A metal baguette tray is helpful but not essential. See text above for alternative.
Ingredients
- 370 grams cold water
- 150 grams active sourdough starter (I've put a link to my sourdough starter tutorial at the top of the article).
- 425 grams whole spelt flour
- 1 tablespoon dried rosemary, optional but very tasty
- 9 grams sea salt
Instructions
- In a large bowl, mix the water with the active sourdough starter and then mix in the flour, stirring until there are no more lumps.
- Cover the bowl with a clean, damp dish towel and let it rest for 30 minutes to 1 hour. This is what is known as an autolyse. You can read about this in the text above.
- After your dough has rested for 30 minutes to 1 hour, mix in the salt and rosemary and knead the dough for a couple of minutes. Because the dough is quite wet, this kneading is done with a spoon (I use a sturdy wooden spoon) and done by stirring, folding, and pulling. Work that dough by folding it, stirring it and stretching it with the spoon.
- Cover the bowl with the same dish towel and leave it to rest for about an hour.
- After one hour, you'll perform the first folding (check out my video above). Cover the bowl again and leave it for one more hour and then perform the second folding. If you've got time for it, you can perform one last folding after yet another hour. Cover the bowl in between. (If you've only got time for one folding then that is better than nothing).
- Once you have gone through the folding phase, leave the bowl on the kitchen counter, covered with that damp towel, for 3-5 hours or until you see good activity in the dough, which means the dough will have risen by at least 50 % but no more than 65%.
- After these 3+ hours, place the bowl in the refrigerator overnight. This will allow the flavors to develop slowly and give the baguettes a good crust and that deeply rich sourdough flavor.
- The next morning, take the bowl out of the fridge and place it back on the kitchen countertop. Leave it here for a few hours before proceeding to the baking phase. This will bring the dough to room temperature.I usually don't bake my breads until mid to late afternoon, but don't take my word for it. Your sourdough is different from mine and ambient temperature also plays a role, so you need to pay attention to your dough to know when it is ready to be baked. It will be at its peak once it is no longer rising but before it starts to deflate. This is the ideal time to put it in the oven. This timing is not an exact science but the change from one phase to the other also does not happen in a flash. Just pay attention to your dough and you'll be fine. A hint: As long as the dough is rising, the dough will be slightly curved downward at the edges of the bowl. Once it stops rising, the top will flatten out.
Shape and bake the baguettes.
- Clean your worktop and spread some flour onto it. Pour the dough onto the floured surface and gently fold one half over itself, then divide it into 4 equal pieces. Shape these pieces into rounds and leave them to rest for 20 minutes. Refer to the video for proper technique.
- Turn on your oven to 250º C / 480º F and place a baking tray in the oven. (The tray need to heat up for at least 20 minutes for best results).At the same time, place a glass dish on the floor of the oven. (You will pour boiling water into this tray at the same time as you put the breads in the oven. This will create steam which is important for the the breads to develop a proper crust).
- Cover your metal baguette tray (if using) with a piece of baking paper and set aside. Alternatively, flour a thick dish towel very well and create four folds in the towel to hold the shaped baguettes. (See the text above for more details).
- Then shape each round piece of dough like this:
- Gently stretch each ball into a small square. Fold about an inch (2.5 cm) of the top of the square down towards the center of the square. Pat down the seem; then grab the sides of the square (now rectangle) and pull them outward a little to elongate the dough a bit before folding in the sides, about an inch (2.5 cm) on either side, towards the middle. Then repeat. Which means folding the top down about an inch (2.5 cm), then stretching the dough out a bit to the sides before folding the sides in towards the middle. Now gently roll the dough until you get an even and elongated shape vaguely resembling a small baguette. Pinch the sides a bit to create the pointy ends. I have attached a video for visuals.
- Place the roll in its designated spot on the baguette tray, seem side down. Alternatively, place it in a fold in the prepared towel. Repeat with the remaining three pieces of dough.
- Put the kettle on and get some water boiling.
- Meanwhile, make three long incisions on the top of each baguette. Lengthwise and at a slight angle.
- When the water boils, pour a cup or two into the glass dish on the floor of the oven; then place the tray with the shaped baguettes on the hot baking tray in the middle of the oven. If you are not using a special baguette tray then remove the hot baking tray from the oven before covering it with a piece of baking paper; then gently transfer the baguettes from the dish towel to the tray.
- Bake for 15 to 20 minutes, turning the tray around after 10 minutes to ensure even baking.